Easy Cookie Icing Bc No Corn Syrup
Jump to Recipe
Looking for the best tasting buttercream frosting for sugar cookies, but one that actually hardens, too? This is your recipe! This AMAZING buttercream icing recipe, made without corn syrup, is PERFECT for decorating sugar cookies and cutout cookies, and it tastes DELICIOUS!
UPDATED FOR 2021: Because this recipe has become so popular over the last couple of years, I've made sure to update the post with even more details & FAQs to hopefully answer any and all of your questions! This recipe gets tens of thousands of readers each year, especially during the holidays, so I want to make sure that this frosting turns out exactly how you hope it will, hence all the details walking you through the recipe in the post! 🙂
Friend, it is an HONOR to know that I can help you bring joy to your gatherings with these deliciously decorated cookies – thank you for letting me be part of your table! 🙂

If you're on the hunt for the absolute best sugar cookie frosting out there that tastes good, is easy to use, and actually hardens after you frost your cookies, I have some good news for you!
This. is. it.
>> The full recipe is at the bottom of the post before the comments begin, but you may want to read through the notes in this post before making it, just to ensure it turns out exactly the way you want it to! 🙂 <<
After years of decorating sugar cookies with buttercream that, yes, tasted yummy, but that required *super* delicate handling because of how easily the beautifully decorated cookies would smudge, I decided it was high time to figure out if it was possible to get that same delicious buttercream flavor & texture, but with a little more practicality for storing and transporting cookies.

A lot of us do not love the flavor of royal icing and really want to figure out if we can get royal icing to taste like buttercream since buttercream has that lovely velvety texture and rich flavor.
And for me, I actually really prefer to decorate cookies with buttercream vs. royal icing, so I was really bound and determined to try to figure out a recipe that might work for both hardening & decorating!
So, I put on my lab coat & started experimenting to find that perfect recipe.
Just kidding. I'm certain I was wearing my typical Mauri's-busy-messing-around-with-ingredients-in-the-kitchen attire: an Aggie or a Texas t-shirt, athletic shorts, and worn-out tennis shoes.
This was a very serious job!
After A LOT of experimentation, I finally landed on this recipe, and I amso excited to finally share it with you!
I think you're going to love it – the flavor of the buttercream is SO good, and it's so easy to work with compared to royal icing – you really don't need any fancy equipment to decorate gorgeous cookies with it.
I'm going to walk you through the simple steps for how to make this icing, but before I do that, let's talk through some things you'll want to know about this recipe, and then we'll chat about some "best practice" tips for how to get that perfect frosting, just so you can get it perfect the first time you make it!
What you need to know before making this recipe:
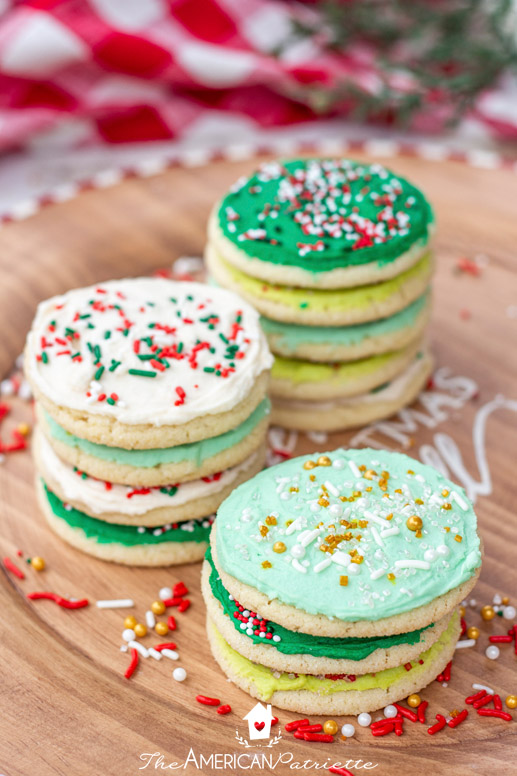
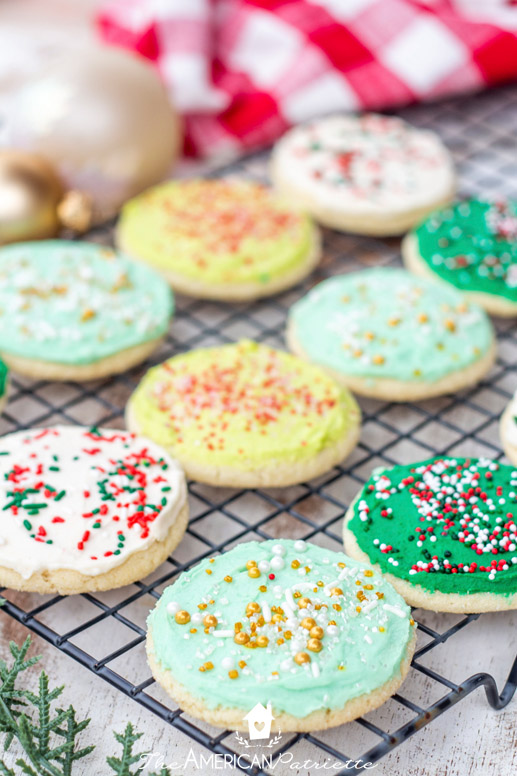
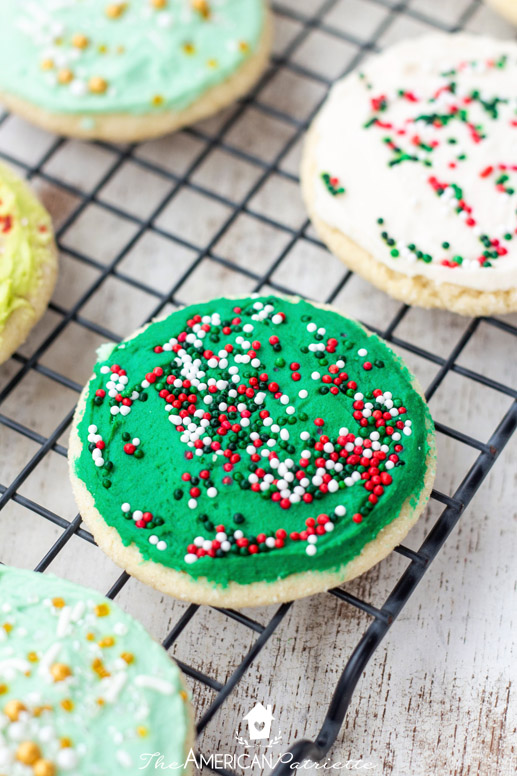
- This hardens up REALLY well for cookies you just want to spread with frosting & then decorate with sprinkles – it's the PERFECT frosting for that type of decorating, and those cookies are then super easy to stack & transport without the stress of smudging the frosting and the cookies all sticking to each other.
- For cookies that you want to decorate with fine detail & piping, the frosting will harden up better than any other buttercream frosting you'll try, and it'll make those easier to stack and to transport, but it will not harden up the same way as royal icing (where you could basically throw rocks at the decorated cookie and it wouldn't mess up). Typically, when you pipe & decorate cookies with buttercream, you're going to need to be very careful with them in transport, and definitely cannot stack them without ruining the fine detail in them. THIS RECIPE CHANGES THAT! You can definitely stack the cookies and transport them MUCH more easily (I do it all the time!!), but they're not 100% smudge-proof. There is no 100% smudge-proof buttercream frosting for sugar cookies (believe me, I've tried), but this gets pretty darn close, and definitely as close as you possibly can without it actually being the consistency of hard-as-nails royal icing. This is my go-to frosting EVERY time I want to decorate sugar cookies, whether it's with a simple frosting & sprinkles or if I'm piping with detail.
- Along those same lines, if you're looking for the exact equivalent of royal icing in buttercream form, you're not going to find it (again, believe me, I've tried!), but this really is a fantastic option. Unlike royal icing, it's not going to get shiny, it's not going to flood, and it's not going to harden up like a rock in the same way. HOWEVER, the taste and texture are out of this world, it's really fun to decorate with, and it hardens up better than any buttercream frosting I've ever tried. Because this recipe has become so popular, I've continued to test it & other recipes just to make sure it really is the best option out there for what you're wanting to accomplish with sugar cookies. (The pressure is on, and I really want to make sure I live up to the expectations!) Inevitably, I keep coming back to this same exact recipe. I've made it dozens and dozens of times, compared it to several other recipes, and it's still my absolute favorite, and I get compliments out the wazoo every time I make these cookies + frosting and share them with people.
- You can use this on any sugar cookie, but my personal favorite are soft and chewy sugar cookies (vs. harder or "puffier" sugar cookies). If soft & chewy is your preference, too, you will LOVE that recipe. Easy to make, and no need to chill the dough before you make them!
- I answer several FAQs at the bottom of the post, so if you're wondering anything else about this recipe before you get started, go check those out!
Tips for the BEST buttercream frosting for sugar cookies (that actually hardens!)
Just so you know: this isn't a fussy recipe. You don't have to work magic and *pray* this recipe turns out.
However, there are some things about this recipe that are a little…particular. But, as long as you follow the particular tips (I'm outlining them for you here), you'll get the exact amazing results for the icing as I know you can get!

Fellow I-don't-like-to-follow-rules-in-my-kitchen friends (we are a stubborn bunch, aren't we?): that's why I'm giving you all these tips up front.
Just trust me on these, okie dokes?
- Contrary to how wrong this feels, you're going to start out by using cold butter. Not room temp. Not slightly cooler than room temp. Straight-outta-the-fridge-cold-butter. This seems *crazy,* I know, BUT, as long as you have a stand mixer (or a hand mixer with some patience on your end), you can do this. The cold butter helps to achieve that perfect consistency. For several years, when I'd make buttercream frosting for my sugar cookies, it was hit or miss on whether or not my frosting was too runny or too grainy. I think a lot of that had to do with the varying temperature of the butter, which then called for a variance in the other ingredients: how much milk/cream (or not) I'd use and how much powdered sugar I'd use to achieve the perfect consistency. After doing some research, I realized cold butter might just be the magic ingredient, and spoiler alert: it was!
- If you're coloring the frosting, USE THE GEL food coloring. Do not use liquid food coloring. I promise: the gel food coloring isn't any more expensive, and it makes a *huge* difference in the texture of the frosting. This is the kind I use, particularly because I can get a good red out of it – I feel like other gels I've bought in the past have a way-too-pink red.
- Use heavy cream, NOT milk. The heavy whipping cream helps to 1) Add creaminess to the icing (which is what we want!), and 2) Help it harden. It's worth it to use the heavy cream!
- Use a stand mixer with the paddle attachment. This will save you a TON of work that I probably wouldn't be willing to do with my arms. Part of the "chemistry" of this icing goes beyond the ingredients – it's also in how you mix 'em together.
Also, I answer a bunch of questions you might have at the end of this post, so be sure to check out the Q&A section if you're wanting even more info on this recipe!
Ok, ready to make this amazing buttercream icing?! Let's walk through the steps to make this cookie icing recipe that hardens!
How to make Buttercream for Sugar Cookies
Here are the stars of the show:
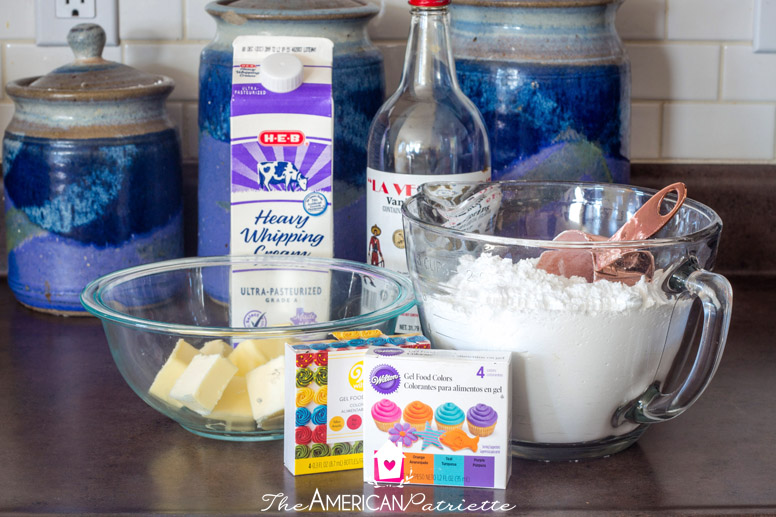
Basic ingredients are all you need! Nothing fancy around here, folks! (And believe me, when I share with you how to decorate these cookies, you're going to find out how really un-fancy it is to decorate such gorgeous cookies!)
Ingredients:
- COLD, straight-out-of-the-fridge unsalted butter, cubed
- Heavy whipping cream
- Powdered sugar, whisked a bit just to get rid of any clumps
- Vanilla extract
- Pinch of salt
- Gel food coloring
Step 1: Cream the butter in your stand mixer with the paddle attachment
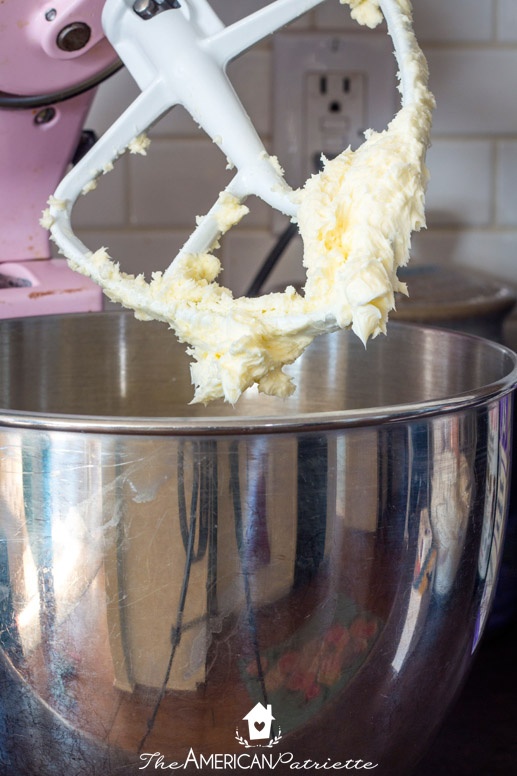
Fridge cold unsalted butter. I'd say "ice cold butter," but I don't want you to use it from your freezer. Fridge is cold enough. 🙂
I know, it really does seem a little counter intuitive to not soften the butter, even just a little bit. But just close your eyes to intuition and just go with this, ok?!
I've made icing about a thousand times, but because I was so particular on this frosting being the perfect consistency for both flavor AND function (hardening up), I did quite a bit of reading about icing, trying to figure out why my buttercream frosting sometimes comes out a bit grainy, especially when I want to color it for decorating.
I came across this blogger's super helpful tips on buttercream frosting for cakes, and I was pretty intrigued about using cold butter. She talks about how using cold butter really helps with the consistency of the frosting, and specifically addressed my annoyance with grainy buttercream. So, I decided to employ this part of her method for the sugar cookie frosting, and it worked!
In this step, your COLD butter WILL get creamy, you just need to let your mixer do some of the legwork (armwork?) for ya. You'll chop the butter up into chunks – about 8 cubes or so – and then whip it on a medium-high speed in your mixer with the paddle attachment for about 4 minutes. Basically, until it's really creamy. Scrape the bowl/paddle attachment with a spatula if you need to.
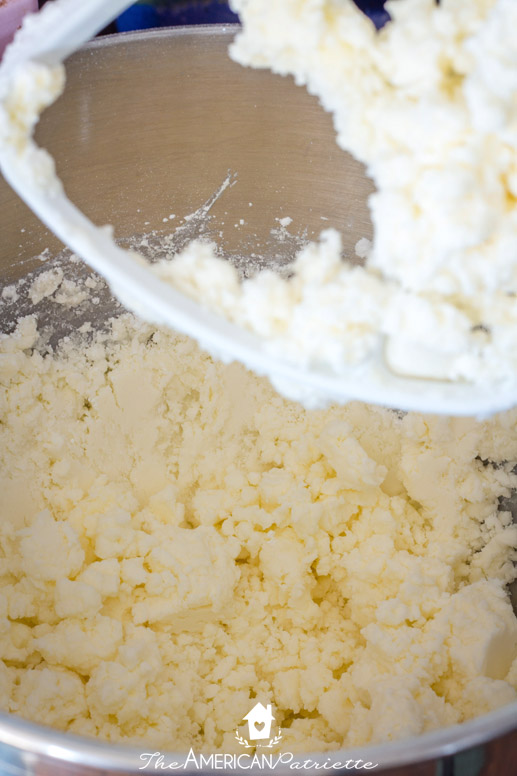
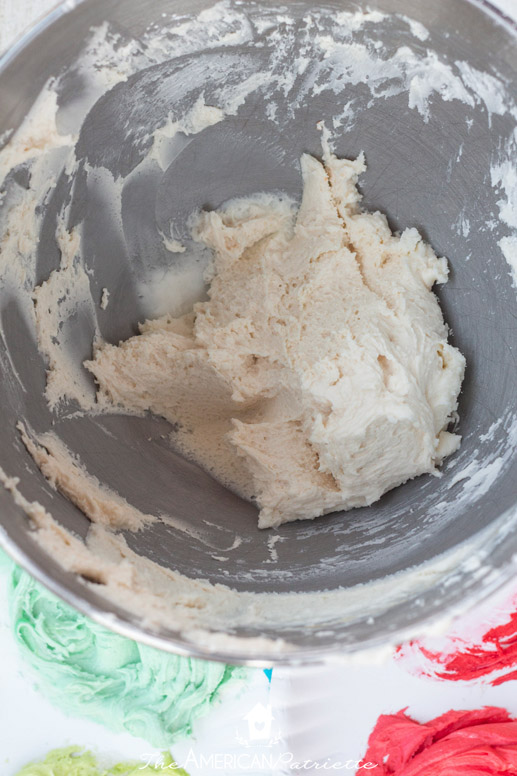
Step 2: Gradually mix in powdered sugar on LOW speed
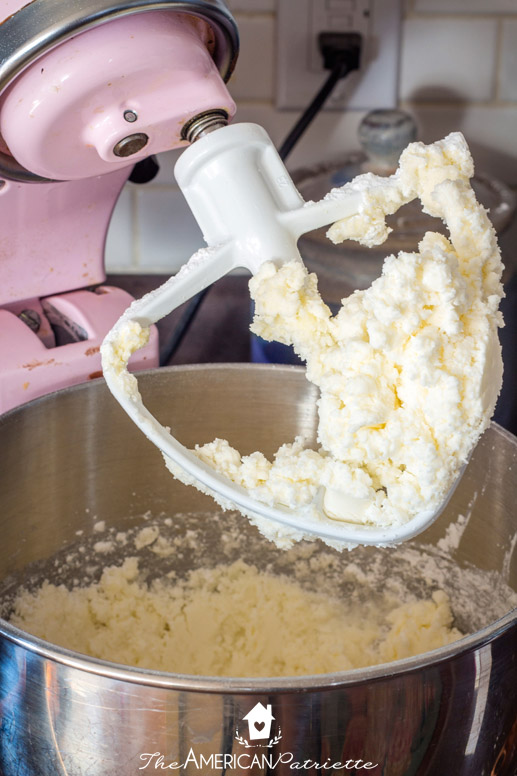
You're going to slowly mix in your powdered sugar while your mixer is running on low speed. Occasionally scrape the bowl/attachment with a spatula, and just keep mixing together until the sugar looks like it's completely mixed with the butter – probably about 2-3 minutes.
At this point, the frosting will be quite clumpy, but don't worry! We're going to address that in just a sec! This is what mine looks like after whipping them together for a few minutes:
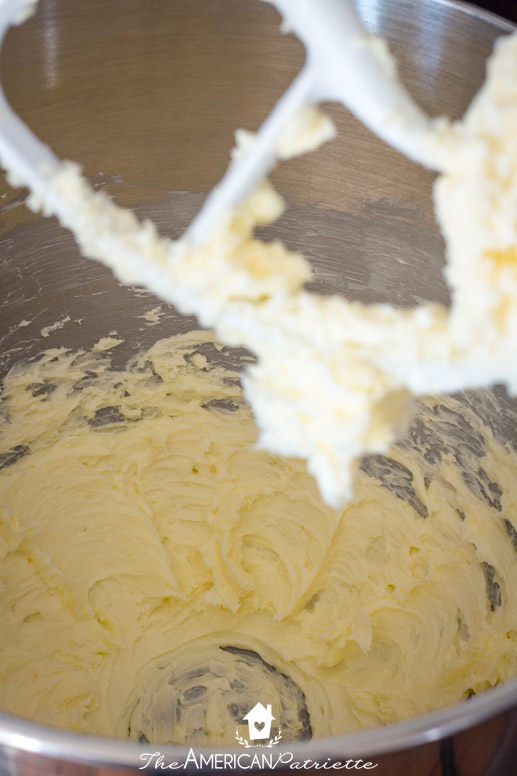
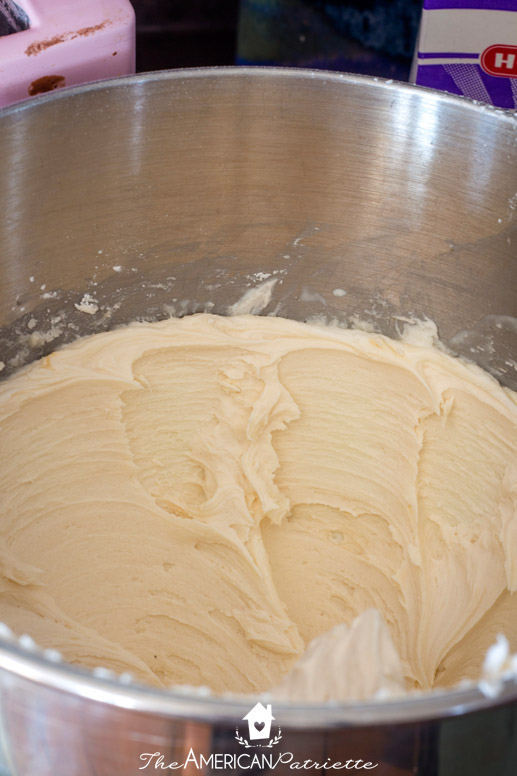
Step 3: Add in the cream 1 tablespoon at a time while continuing to run the mixer + add vanilla
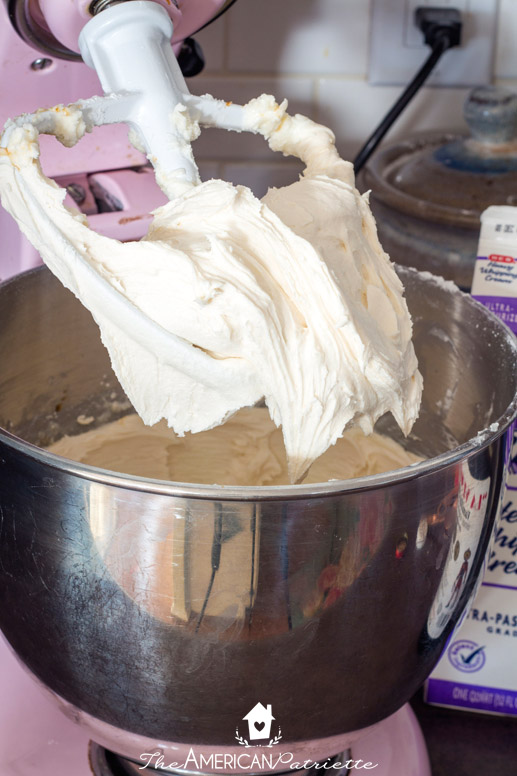
This is where the icing really starts to get, well, creamy! While you're running the mixer on low speed, add in 1 tablespoon at a time of cream to the bowl. You really should only need 5 tablespoons of cream (if you're making this exact recipe – this recipe makes enough frosting for about 24-30 cookies + you'll likely have a little leftover), so don't get carried away with adding too much!
Add the vanilla & pinch of salt after you add in the cream and continue to mix.
Some will suggest using a clear vanilla extract if you want crisp white frosting. I used my regular dark brown Mexican vanilla extract that I use for everything when I bake, and I really didn't think it made that big of a dent in the white tint of the frosting. You can see in all of the photos of these cookies how the white turned out.
See, look how creamy it gets!
Step 4: Add food coloring if desired!

If you're not coloring the frosting, your job is basically done at this point other than adding the icing to the sugar cookies!
If you are coloring it, though, like I mentioned at the beginning, you'll definitely want to use the gel food coloring – it'll help maintain the creamy-and-not-grainy consistency of the buttercream, and it'll help make sure it hardens up better than if you were to use liquid food coloring.
(I talk in detail about how to actually decorate these sugar cookies like a pro in this post!)
Important tips about the frosting:
- Make sure you ice the cookies fairly soon after making the frosting. You don't have to race the clock, but you also don't want to make this, let it sit out on the counter or in the fridge for a few hours, and then frost the cookies. The icing really does start to harden! Not like a rock, but, it'll harden up enough over a couple of hours that makes it really difficult to spread evenly over the cookies.
- You can kind of make it ahead of time as long as you store it in an airtight container. I know, I'm contradicting myself here. I did find that, I could make the few "base colors" of frosting I wanted to use (basically, the 2-3 colors of frosting I wanted to spread onto the cookies before doing the detailed decorating), do the "base" layer of frosting on the cookies within about an hour of making the icing, color the rest of the frosting with a bunch of different colors for the "piping," store those colors in airtight Ziplock baggies, and that frosting stayed soft much longer and gave me a lot more wiggle room with time for decorating. So, that's definitely an option.
I have more tips at the bottom of the post. Good grief, how much can one say about frosting?! Apparently a lot. 🙂
Here's what it looks like to add some coloring to the frosting:
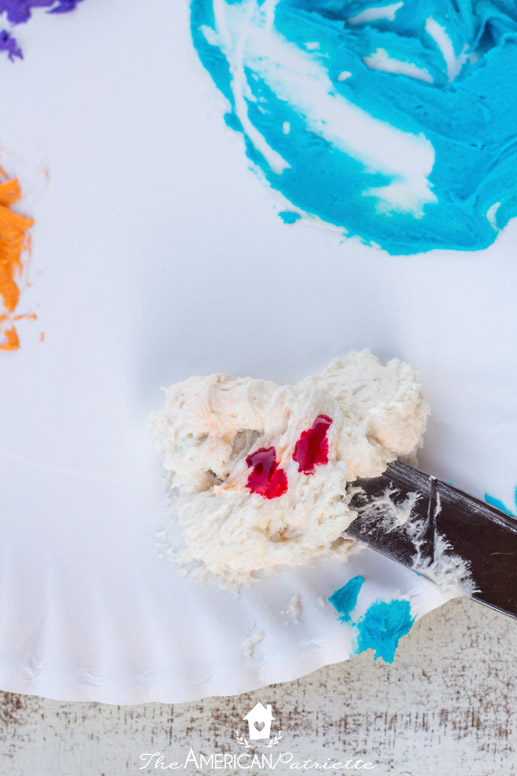
Just start out with a couple drops of the gel, and then you can always add more.
Mix and match colors – you can have a lot of fun with this! 🙂
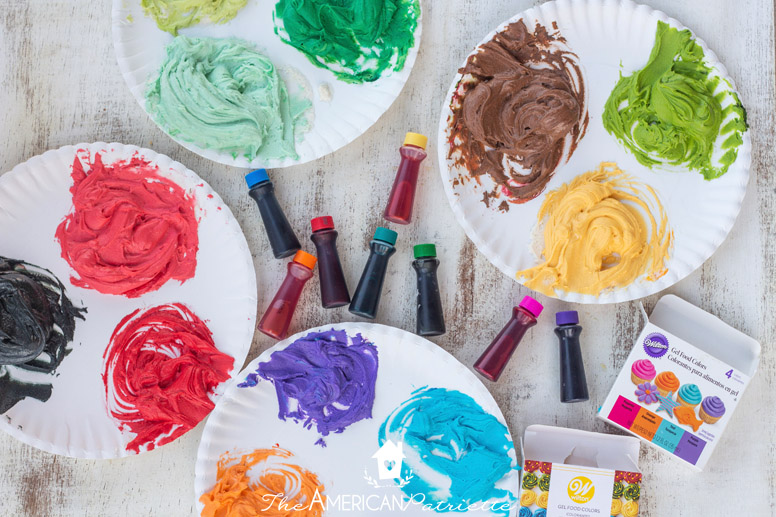
But, make sure you don't color ALL of the frosting if you want to have some white to decorate with, too. Just set some white icing aside so you don't forget. 🙂
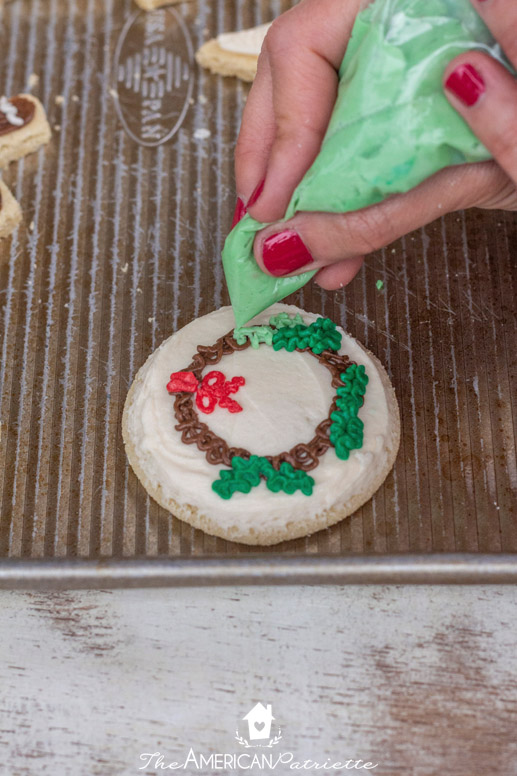
Then frost your cookies!
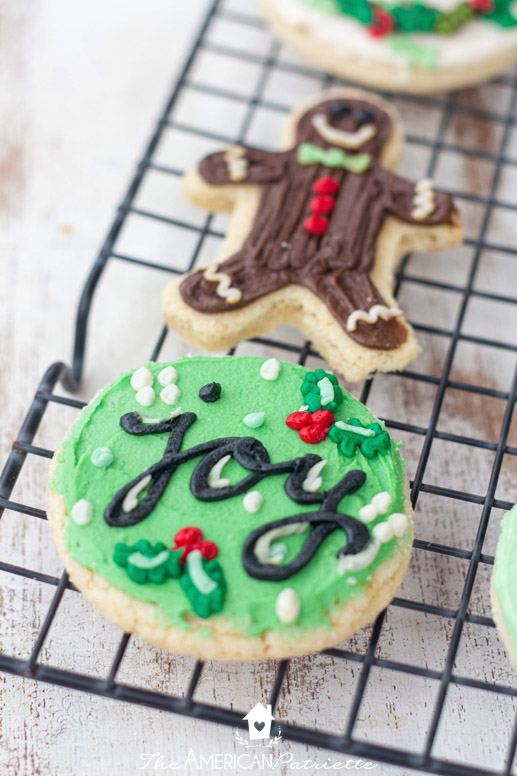
To decorate gorgeously-piped cookies like these, check out this post to see how to decorate sugar cookies like a pro!

Buttercream Frosting Q&A:
- How long does it take for the buttercream to harden?
After spreading the buttercream on the cookie, you'll notice it harden up quite a bit within a couple of hours. Before stacking them, though, I would give them overnight to harden, and then stack them on top of each other. - How stiff does the frosting get?
This frosting isn't like royal icing – it won't completely harden up like a rock – so you won't want these to tumble around a bunch in a container if you're transporting them somewhere. However, you can stack them (and for the cookies that you're not necessarily decorating with a lot of detail, you can really stack those & not worry about them getting super smudged), just don't be too rough with 'em. This batch you see in the photos took a 3-hour car ride with us to visit family, and they were completely fine stacked on top of each other in a covered Pyrex glass dish. (Note: I have not tested this myself, but I had a reader reach out to me and tell me that she packaged these up and mailed them, and the decorated cookies were just fine when they arrived at their destination, so that was exciting to hear!) - Can I make this frosting ahead of time?
This is exactly what I did: I made the basic frosting recipe, then used the food coloring to dye the 3 different colors I wanted to use for the "base" of the cookies (those different shades of green, plus you see I used white for the base of one design), spread the frosting on the cookies to give all of them that initial coat of frosting. Then, I dyed the rest of the frosting to make the other colors, put it all in the Ziplock baggies (which are great for storage and for piping as you'll see in tomorrow's post) did some decorating, and then saved the rest of the frosting for the following day to finish up decorating them. I did all of that within about 2 hours after making the frosting. The dyed frosting in the baggies stayed completely soft overnight, but the baggies were all sealed with the air pressed out of them. And, I kept them all out on the kitchen counter so they stayed at room temp – working with fridge-cold icing is hard…literally! It's not soft!But, to sum it all up: I wouldn't necessarily recommend making the entire batch of frosting ahead of time and waiting until the following day to do the base coat. I would do all of the base coats soon after you make the frosting – within an hour or so. Then, you can do what I did and store the smaller amounts with the colors in the baggies. - Do I have to refrigerate the icing?
Nope! - Can I use milk instead of cream?
The heavy whipping cream really helps with that creaminess of the icing, and I think it helps tremendously with helping it to harden. Unless you're in a pinch, I'd stick with heavy cream! - How long will the icing taste good on the cookie?
I made these to share on here & then saved them for a family weekend a few days later. Even on days 5 & 6 after making them, the cookies + the icing still tasted great! - Can you flood this icing?
Nope, you'll need to spread the bottom layer with a butter knife or spreader, and then for the finer decorating, you'll need to pipe it using my easy sugar cookie decorating method. (Honestly, this is a really fun way to decorate cookies!) - How many cookies will this frost?
About 24-30 cookies. If you're just spreading the frosting & not piping, you can probably get it to stretch to all 30 cookies. If you're piping, since you'll need to divvy up the frosting to make different colors, I'd count on about 24 cookies. - Does the frosting harden up enough to package up frosted sugar cookies and send them in the mail? Short answer: YES! Longer answer: you would probably want to stick with mailing ones that aren't finely decorated, but rather the ones that are simply frosted with a layer of icing + sprinkles. I wrote a whole post on how to mail frosted sugar cookies – go check it out for a lot more details on how to do this and ensure your cookies arrive fresh & in-tact!
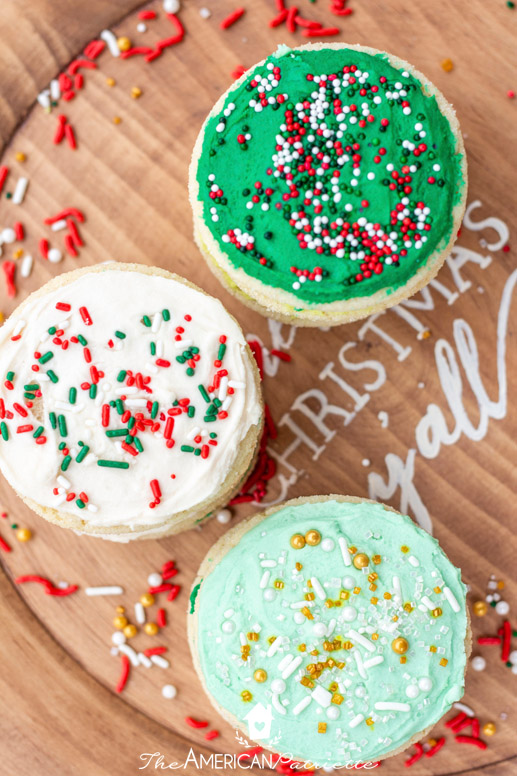
- Can you freeze the frosted sugar cookies? Because I get this question every so often, I tried it the other day to see what would happen. I tried it with ones that had just a layer of frosting & sprinkles (not highly decorated ones with lots of piping and lots of different colors) – I froze some that had white frosting, some that had green frosting, and some that had red frosting, all with sprinkles. After freezing, the red ones were slightly discolored – they didn't look terrible, but they didn't look as fresh. The green and white ones looked fine, and the frosting itself tasted fine after having been frozen, but the sugar cookie also didn't taste as fresh. I personally much prefer a chewy sugar cookie to a crisp/firm one, but the chewy cookies were more crumbly after having been frozen. So, I'm thinking that, if you really want to make and freeze them, you could potentially use this frosting recipe, but then choose a different sugar cookie recipe – one that produces firmer, less-chewy cookies – and you might have better results than I did.
- Can you add the buttercream frosting to squeeze bottles? I had a reader ask me this question (you can see my response in the comments, but I'll also talk about it here) – I haven't done this before, but you probably can do it as long as you either 1) use small squeeze bottles (so that the frosting fills the bottle), or 2) at least double the icing recipe. Because this is pretty thick icing and really isn't runny at all, if you add it to squeeze bottles vs. using plastic baggies to pipe frosting (you can go check out my VERY detailed tutorial for decorating cookies with this frosting), you'll want to make sure there's enough pressure in the bottle for the icing to actually squeeze out. It's really easy to do this with sandwich baggies, but I'm not sure if it'll be that easy with squeeze bottles. (That being said, if you do this with squeeze bottles, let me know how it goes! I often have readers report back to me to let me know different tips and tricks they used when working with this icing, so I love getting feedback so I can include even more helpful information in this post!)
Whew. Any other questions I can answer for ya?!
Now that you've made your frosting, are you ready to decorate?! Learn how to decorate these gorgeous sugar cookies without any special culinary experience or fancy-schmancy tools.
As impressive as these cookies turn out, I might even "un-impress" you with how un-fancy and easy this process is!
Also, if you're still in need of a great sugar cookie recipe, check out my favorite soft & chewy sugar cookie recipe.
And, if you want access to this recipe + some other Christmas favorites AND some great holiday baking tips, make sure you snag your free Holiday Baking Cheat Sheets! Just fill out the form below and they'll get sent straight to your inbox! 🙂
Ingredients
- 12 tbsp COLD unsalted butter, chopped into about 8 pieces
- 5 c powered sugar
- 5 tbsp heavy cream
- 3 tsp vanilla extract
- 1/4 tsp salt
- Gel food coloring
Instructions
- In a stand mixer using the paddle attachment, whip the butter on medium-high speed for about 4 minutes until really creamy.
- While mixing on low, gradually mix in powdered sugar, occasionally scraping the bowl. Mix together for about 2-3 minutes. The frosting will be quite clumpy – don't worry! We'll make it creamy in just a sec!
- While continuing to mix, add in the cream 1 tbsp at a time. You really should only need 5 tbsp of cream – just continue to mix together and the frosting WILL get creamy! Mix in the vanilla & salt - continue to beat for another few seconds to ensure the vanilla and salt are fully mixed in.
- Color frosting as desired with gel food coloring. Spread frosting on sugar cookies soon after making the frosting – it will start to harden after an hour or two.
Notes
See the post for more details and step-by-step visuals & explanations!
proctorcafrocks1948.blogspot.com
Source: https://theamericanpatriette.com/the-best-buttercream-frosting-for-sugar-cookies-that-hardens/
0 Response to "Easy Cookie Icing Bc No Corn Syrup"
Post a Comment